I am off to Greer, Arizona today for a fun Father's Day weekend, 40 degrees cooler than this 105 degree weather here in Phoenix. Hope you have great weekends!
____________________________________________________________________________
Hi Forward Home Readers!! It's Ashley from over at Project Bazaar Blog!! I am super excited
to be here today and share a project for my FAVORITE holiday, the 4th of
July!!
I LOVE the 4th of July, the patriotism, the red, the white,
the blue and especially the fireworks!!
I am going to share this fun wreath tutorial with you
today!!
Let's gather our supplies and get started...
I used:
Straw Wreath Form
2" Strips of White Floral Fabric
2 1/2" Ribbon
4th of July Garland
Metal Star Scrapbooking Brads
1" Ribbon for Hanging
Strait Pins
Hot Glue
(there are some extra supplies in the picture, because you
can make your pinwheels out of fabric, or smaller ribbon, and you can adorn them
with buttons, brads, rhinestones or whatever you would like)
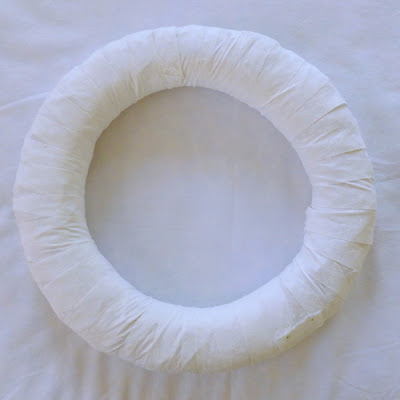
Cover your wreath form with your 2 inch strips of fabric. I
pinned it down at the start and stop of each piece, but you could use hot glue
if you would like. ( I wanted to be able to take everything off and
use the wreath form again for another holiday.)
Most of my pins ended up being in the back, but a couple
were in the front and I just covered them up with my decorations.
Make your pinwheels (but don't attach the center decoration
at this point.
I ended up making 8, but add as many or as few as you would
like.
Arrange them on your wreath form as desired.
Pin in place. Some I was able just to pin in the middle,
others I pinned on the edges as well.
Take your garland and cut about a 2-3" piece off the
end.
Through the center of the garland you will see 2-4 wires.
Take the ends and twist the wires firmly so your little
pieces don't fall off, then kind of roll up the end of the wire so it will
hold.
Adjust your garland pieces as desired and pin or
glue in place on your wreath.
Take your brads and cut off the back
piece.
Hot glue in place in the center of your pinwheel.
Take your 1" ribbon and make a loop, large enough that
it will go around your wreath and hang and your desired
length.
Tie the end in a square knot, (if desired add a
bow on top of the knot.)
Place the loop behind the wreath form, if you have a bow
make sure it is at the top, if you just have a knot place it off to the side
still at the top.
Take the bottom of the loop and go over the wreath form, and
under your knot.
Pull tight.
Hang it up and ENJOY!!
Thanks to The Forward Home for having me over today!! Come
stop by and check out Project Bazaar Blog for more
fun tutorials!!


No comments:
Post a Comment